 One of the nice changes in Windows
First, open the Control Panel and type the word 'problem' into the upper-right search box. One of the first results will be the Problem Reports and Solutionsshortcut shown in the screenshot below. Click on it and the Problem Reports and Solutions window will open.
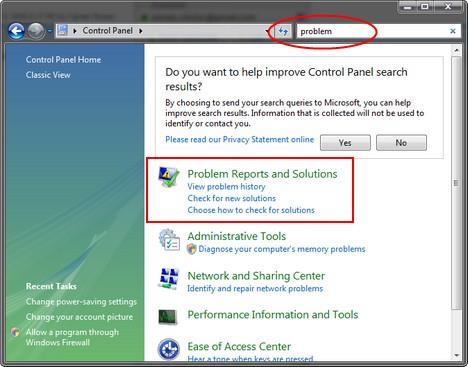
An alternative is to search for the word 'problem' in the Start Menu search box and click on the Problem Reports and Solutions shortcut.
The Problem Reports and Solutions window is split in two areas: on the left side you have the Tasks menu with all the actions and settings that can be done with this tool and on the right side you can see some of the solutions thatWindows Vista
has identified for some of your recent computer problems.

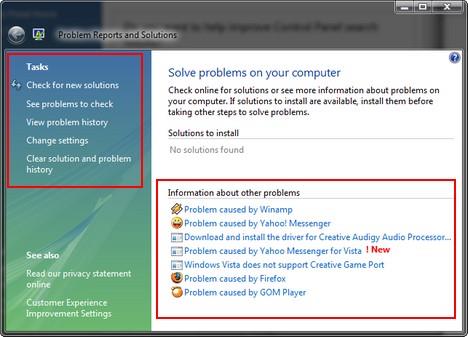
How to check for solutions to your computer problems
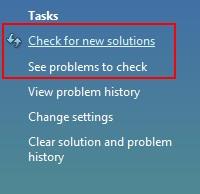
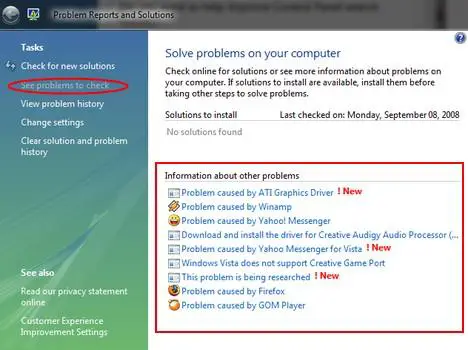
There are two ways to check for solutions to your computer problems. The first one is to click on 'Check for new solutions'. When you click here, Windows Vista will automatically search for solutions to all your recorded problems. If you want to check for solutions to a specific problem, click on 'See problems to check'.
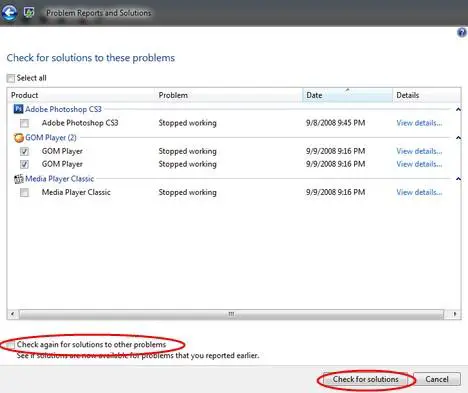
After you click on 'See problems to check', you will see a list with all of your recent problems. Select the ones you want to solve and click on 'Check for solutions'. Please note that if you select the option from the lower-left side of the window which says 'Check again for solutions to other problems', Windows Vista will search for solutions to all the other problems that have been recorded so far.
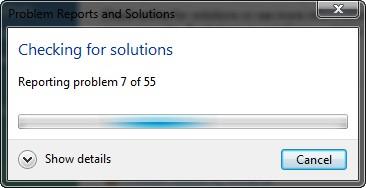
When the process of checking for solutions starts, you will see a small window similar to the one below. Depending on the number of problems which are analyzed and the speed of your internet connection, Windows Vista will spend from a few seconds up to a few minutes to find solutions to your problems.
In some cases you will receive a message saying that 'Microsoft needs more information to try to solve a number of problems'. This happens when more details are needed in order to find a solution.
If you want to send those details to Microsoft, click on the 'Send information'button. If you want to know more about the additional details which will be sent, click on the small arrow near 'View problem details'. If you do not want to send any additional information to Microsoft, click the Cancel button. However, you should keep in mind the fact that the process of finding solutions for those specific problems will be stopped in this case.
If you want to send those details to Microsoft, click on the 'Send information'button. If you want to know more about the additional details which will be sent, click on the small arrow near 'View problem details'. If you do not want to send any additional information to Microsoft, click the Cancel button. However, you should keep in mind the fact that the process of finding solutions for those specific problems will be stopped in this case.

After the process of finding solutions is finished, you will see all the results in the left side of the main Problem Reports and Solutions window. All the new problems for which solutions have been found will be marked as '! New', as you can see in the screenshot below.
In order to access a solution, click on the name of the problem. A new window will appear as shown below. Here you will find a description of the problem together with troubleshooting tips, possible solutions and links to sites with information related to your problems. To solve your problem, follow the steps recommended by Microsoft and then click on OK. Some solutions might involve rebooting your PC, so it can be a good idea to write down all the steps or print them before following the procedure described there.
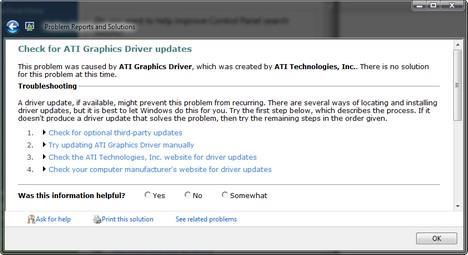
Please keep in mind that there is a possibility for some of the solutions not to work. While writing this article I have found solutions which worked and other which didn't.
View the history of your computer problems
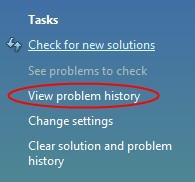
If you are interested in viewing details about past computer problems, when you are in the Problem Reports and Solutions window, click on 'View problem history'.
A list with all your past problems will be loaded, grouped by product. You will also see details such as the type of the problem, then the date when it happened and the status regarding its solution.
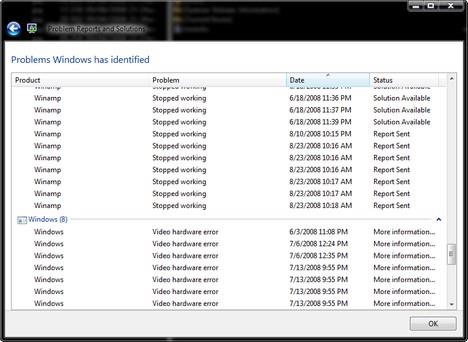
To view more details about a problem, just double click on it.
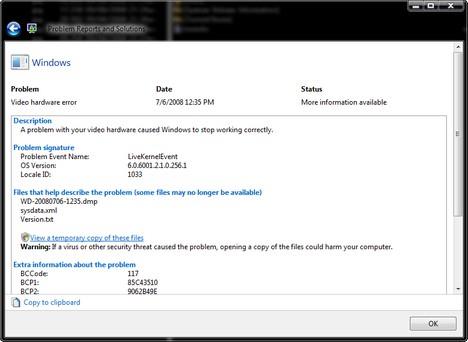
After reading all the information, click on OK.
How to configure Problem Reports and Solutions
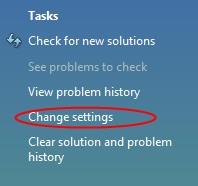
Accessing all configuration options is very easy: when you are in the Problem Reports and Solutions window, click on Change settings.
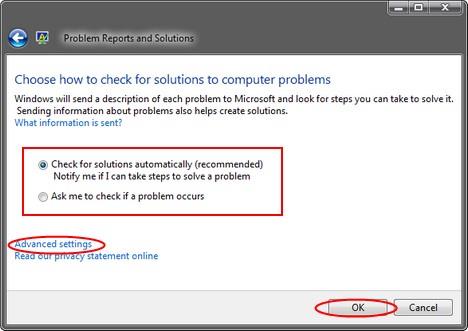
In the next window you have two main options: the first one is to let Problem Reports and Solutions check for solutions automatically when a problem is encountered and notify you when you can take the steps to solve it and the second option is to check for solutions only on user request. Select the option you prefer and click OK. If you are interested in other settings, click on the'Advanced settings' link.
Here you can enable or disable problem reporting for your programs. If you want to disable Problem Reports and Solutions, click on Off and then on OK.
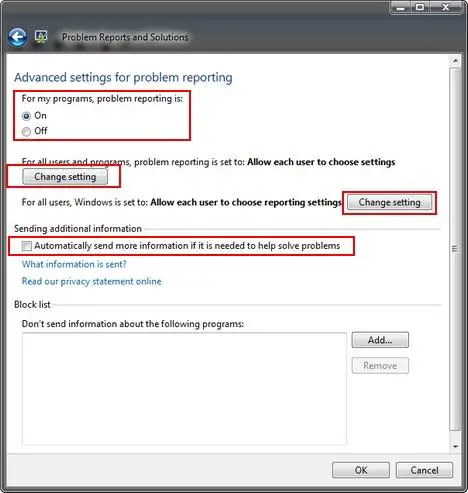
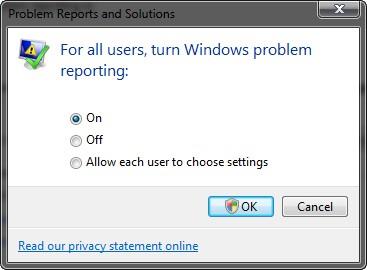
Next, you can turn on or off 'Windows problem reporting' for all the users on your PC. To do this, click on the first 'Change setting' button and choose the option you prefer. Also, keep in mind that this setting can be changed only if your user is an administrator. Otherwise, it will not work.
You can also choose how reporting is done for all users. The best option would be the recommended one: 'Automatically check for solutions'. However, you can choose any of the other options: 'Allow each user to choose reporting settings', 'Ask each time a problem occurs', 'Automatically check for solutions and send additional information, if needed'.
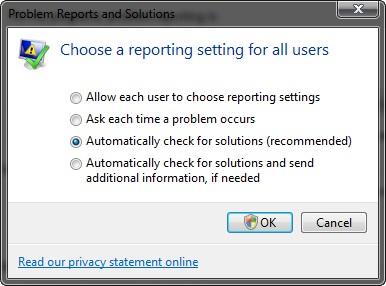
Once you have selected the option you prefer, click OK. Again, remember that this setting can be changed only with an administrator account.
The last configuration option is about the sending of additional information when needed. If you want Problem Reports and Solutions to send all aditional information without first asking for user permission, check the option that says'Automatically send more information if it is needed to help solve problems'.
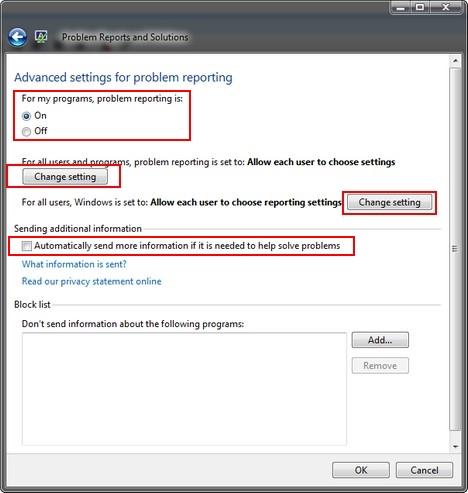
When you have finished changing the settings you wish, click on OK.
Clear the history of your problems and solution
If you are interested in removing the history of all your computer problems and solutions, when you are in the Problem Reports and Solutions window, click on 'Clear solution and problem history'.
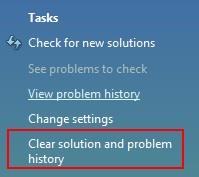
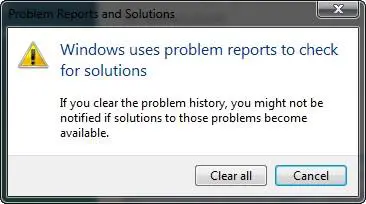
Windows Vista will ask you to confirm this action. Click on 'Clear all' and all history will be erased.
No comments:
Post a Comment
Note: only a member of this blog may post a comment.